General Settings
This sections allows to configure general settings related to:
-
IXM Mobile (This tab will be visible only if IXM Mobile license is purchased)
Screen Layout of Wiegand

Wiegand Format is a string of predefined bits. In simpler terms, it is the arrangement of binary card data and is required to analyze the data received from the input, and before sending, the data will be put into a predefined format. Wiegand strings consist of even parity, odd parity, facility code, and ID codes. Invixium Devices support the following Wiegand formats:
-
26-bit standard format
The Standard 26-bit Format is an open format. It is widely used by various industries and is available from many sources. Almost all access control systems accept the Standard 26-bit Format.
-
Pass-Thru Wiegand
This format is customized as compared to the 26-bit standard format. This Wiegand Format string does not contain any Parity bits and Facility code bits, the format string of this Wiegand type will only contain ID codes.
-
Custom Wiegand
In custom Wiegand Format, all parts of the Wiegand string are customizable. This type of Wiegand Format contains Parity bits and ID code bits in the Wiegand Format string. The maximum length of a custom Wiegand Format is 512 bits. Custom Wiegand Format gives complete freedom to the admin to create a Wiegand Format. Admin can specify any number of user fields, can have any number of ID bits, and can have a maximum of four even parity and four odd parity bits.
Field Description of Wiegand
A list of existing Wiegands is displayed. Please note that the Standard 26-bit Format Wiegand is automatically created and it can not be deleted.
Hover mouse over  button on the top right corner of the screen and select the
"Passthru"option from the dropdown menu. Following options will be displayed -

Wiegand Name:
Enter the name of the Passthru Wiegand.
Total Bits:
Enter the total number of Bits that has to be assigned to the Wiegand.
ID Bits:
Enter the number of ID Bits of the Wiegand. ID Bits can not be more than the Total Bits.
ID BIT MASK
You will see a number of small boxes where each box represents a Bit. The total number of boxes displayed will be equal to the Total Bits entered starting with 0.
Select the position of ID bits to create an ID bit mask. To do so, click on the legend box of ID Bit to pick the color and click on the Bit Format to mask it. The color of that Bit(s) will change to the selected box color. You can either click on the individual Bit or press <Left click> and drag the mouse to select bits in continuity. Selected Bits can be distinguished by a different color.
|
NOTE The number of masked ID Bits should be equal to the number of ID bits.
|
Once selected, click on Save button. The Wiegand format will be created and displayed in the list.

|
Hover mouse over button on the top right corner of the screen and select the
"Custom" option from the dropdown menu. Following options will be displayed -

Name:
Enter the name of the Custom Wiegand.
Total Bits:
Enter the total number of Bits that has to be assigned to the Wiegand. Total Bits can be between 1 - 512.
Click on Next button. Following screen will be displayed -

FORMAT
You will see a number of small boxes where each box represents a Bit. The total number of boxes displayed will be equal to the Total Bits entered starting with 0.
Now you can specify the ID Bits, Even and Odd Parity Bits, Flex Bits, Facility Code Bits and Issue Level Bits within the Total Bits. To do so, click on the legend box of respective Bit to pick the color and click on the Bit Format to mask it. The color of that Bit(s) will change to the selected box color.
Once selected, click on Next button. Following screen will be displayed -


|
Please note that this screen will be displayed only if Even and Odd Parity Bits, Flex Bits, and Facility Code Bits have been masked within the Total Bits. |
Specify the Bits for Odd Parity, Even Parity, and Flex Bits by selecting them in the respective boxes as per requirement.
Once selected, click on Save button. The Wiegand format will be created and displayed in the list. Click on Back button to go back to the previous screen.
Click on the  icon in the Action column of respective Wiegand row. Details of the selected Wiegand will be displayed. You can make required changes and click on Save button to save the Wiegand.
Hover the mouse on  button to send the selected Wiegand to one or more Devices. Select "Selected" option to upload particular Wiegand(s) or "All" option to upload all Wiegands. Following screen will be displayed to select the Devices -
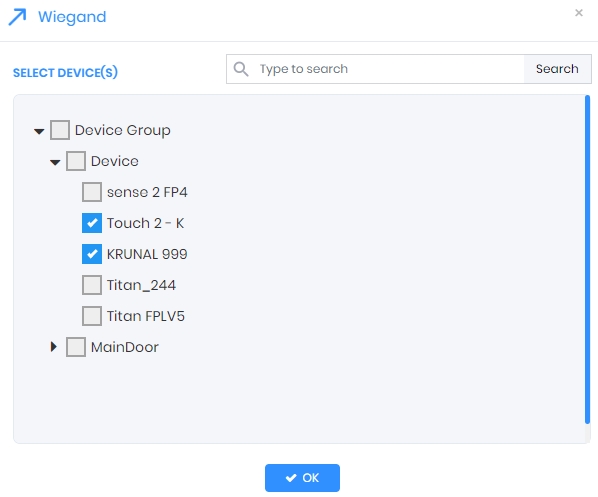
Click on the arrow keys to expand the Device Group and select the desired Device(s) by clicking on the checkboxes.
Once selected, click on OK button to send the selected / all Wiegand(s) to the selected Device(s).
Upon completion of the process, the “Application Logs” window will show a success or failure message.

Click on  button to delete one or more selected Wiegands. The application will display a confirmation message as follows -

Click on Delete button to delete the selected Wiegands. The application will display "Wiegand(s) deleted" message and they will be deleted from the list. Click on Cancel button to discard the action.
|
NOTE A Wiegand Format can not be deleted if it is used to configure the Digital Card. |
Screen Layout of Smart Card Settings

IXM Devices come in model variants that are equipped with an internal Smart Card reader for multi-factor authentication. Smart Cards are RFID access cards that have on-card memory to store biometric data and are usually provided to individual users who are granted access to the facility. All issued cards can be monitored and tracked in the IXM WEB database.
Field Description of Smart Card Settings
Smart Card Configuration
Through this option you can configure the Employee data that should be stored in the Smart Card as per requirement. So when an Employee is transferred to a Smart Card through Home >> Employees >> Transfer section, the Employee data that will be stored in the Smart Card depends on the Smart Card configuration.
None
Select this option by clicking on it if you don't want to transfer Employee data from any Card of the Employee(s).
Default Card
Select this option by clicking on it if you want to transfer Employee data only from the Default Card of the Employee(s).
All Cards
Select this option by clicking on it if you want to transfer Employee data only from all Cards of the Employee(s).
AVAILABLE
A list of all Employee fields is available to select from. Click on the + icon in the box of respective field to add that field to SELECTED section.
SELECTED
A list of default selected Employee fields along with the fields selected by you will be displayed in this section. Data belonging to these selected fields will be written on the Smart Card. You can remove any of the fields (except "Employee ID" and "First Name") by clicking on the x icon in the box of that field.
"Employee ID" and "First Name" are mandatory information to be stored on a Smart Card and therefore can not be removed from here.
Click on Save button to save the configuration. Click on Reset button to remove all the selected fields (except "Employee ID", "First Name", and other default fields).
Smart Card Employees
There are some occasions such as Employee leaving the company, where access of a particular Smart Card needs to be deactivated (Revoked) and reactivated (Unrevoked).
Click on "Smart Card Employees" to expand the section. A list of Employees with their Smart Card details will be displayed as follows -

To revoke Employees, select the Employees whose Cards need to be deactivated and click on Revoke button on the top right corner of the list.
To unrevoke Employees, select the Employees whose Cards need to be activated again and click on Unrevoke button on the top right corner of the list.
Following screen will be displayed to select the Devices -

Click on the arrow keys to expand the Device Group and select the desired Device(s) by clicking on the checkboxes.
Once selected, click on OK button to Revoke / Unrevoke the selected Employees from the selected Device(s).
Upon completion of the process, the “Application Logs” window will show a success or failure message -

Screen Layout of IXM WEB Server

Field Description of IXM WEB Server
Configuration
URL:
Automatically displays the IP address of the server where IXM WEB has been installed.You can change it in case there is a change in IP address.Cloud Port:
Automatically displays the Port number on which IXM WEB has been installed.You can change it in case there is a change in Port number.Click on Apply button to save the changes. Following screen will be displayed to select the Devices - Once selected, click on Apply button. The new IP address will be available to IXM WEB as well as to the selected Devices. Click on Cancel button to discard the action.Upon completion of the process, the “Application Logs” window will show a success or failure message -
IXM WEB Snackbar Notification
This feature sends live snackbar notifications to all the logged in users of IXM WEB whenever an event related to IXM Health module occurs.
Enable
Click on the checkbox to enable or disable the feature. If the feature is enabled, snackbar notifications will be sent to all logged in users whenever events related to IXM Health module take place. For example, whenever Mask Authentication or Thermal Authentication is attempted, a notification informing its success or failure will be sent to the users.
Screen Layout of LDAP

IXM WEB supports Lightweight Directory Access Protocol (LDAP).
Field Description of LDAP
Connection String:
Enter the valid LDAP string.
|
NOTE Common syntax of a LDAP string is “LDAP://domain-controller/dc=ad,dc=local" where domain-controller is the full domain name and "dc" is the domain culture.
|
Once entered, click on APPLY button to save and apply the settings.
Click on RESET button to restore the original settings.
Screen Layout of IXM Mobile

|
NOTE This tab is visible only if IXM Mobile license is purchased. You can request License from License module >> click on IXM Mobile icon.
|
Use this section to specify the Administrator for IXM Mobile app and configure Digital Card settings which will be used while generating Digital Card Numbers.
Field Description of IXM Mobile
IXM Mobile Admin
|
|
This feature is exclusively for IXM VERTU devices. |
To secure sites from unauthorized access, transferring the Digital Signature / Key to IXM VERTU devices is very important. But since IXM WEB cannot communicate directly with VERTU devices, the Digital Signature / Key needs to be transferred manually by an Employee who is authorized to do so. Once logged in to the IXM Mobile app, this Employee can follow the instructions to transfer the Digital Signature / Key and secure the site.
Employee:
Select Employee(s) authorized to transfer the Key from the dropdown list. Remove a particular Employee from the list by clicking on x icon of that Employee.

Once selected, click on Save button to save the settings.

Digital Card Configuration
Configure Digital Card settings by providing the following information. This information is used while entering details of Digital Cards from Home >> Employee >> Biometric Data Enrollment >> Digital Card section.
Format:
Select the Digital Card Format from the dropdown list.
A list of Wiegand Formats defined from General Settings >> Wiegand section will be displayed. Select the Wiegand Format in which the details of the Digital Card will be formatted and sent to the IXM Mobile app.
Digital Card:
Denotes the method used to generate Digital Card Number.
Select the method from the dropdown list. The following three methods can be used to generate Card Number:
None
Digital Card Number can be entered manually.
Employee ID
The Employee ID will be considered as the Digital Card Number.
For example: The Card Number of an Employee with ID 1025 will also be 1025. But if the Employee ID is having an alphanumeric value, then the Card Number will be blank.
Start with
The Digital Card Number will start with a particular sequence number.
For example: If 1001 is entered, the Card Number will start with 1001. The next number generated will be 1002 and so on.
Start With:
This option will be displayed only if Digital Card is selected as "Start With".
Enter the starting number of the Digital Card.
Allow Offline Transactions
Click on the checkbox to enable or disable the feature. A tick mark in the box indicates the feature is enabled. This feature specifies whether the Digital Card transactions can be done offline or online.
Enabling this feature allows the users to authenticate the Digital Card even if the mobile device is offline. While configuring a Digital Card for the first time, the mobile device should be online so that the IXM Mobile app communicates with the server to read the card details and save them on the mobile device. For the subsequent transactions, the credentials are read from the mobile device itself.
Disabling this feature will allow the users to authenticate the Digital Card only if the mobile device is online. For each transaction, the IXM Mobile app will communicate with the server to fetch the card details required for authentication.
Once entered, click on Save button to save the settings.